Scenarios
Tests are written on the Scenarios page.
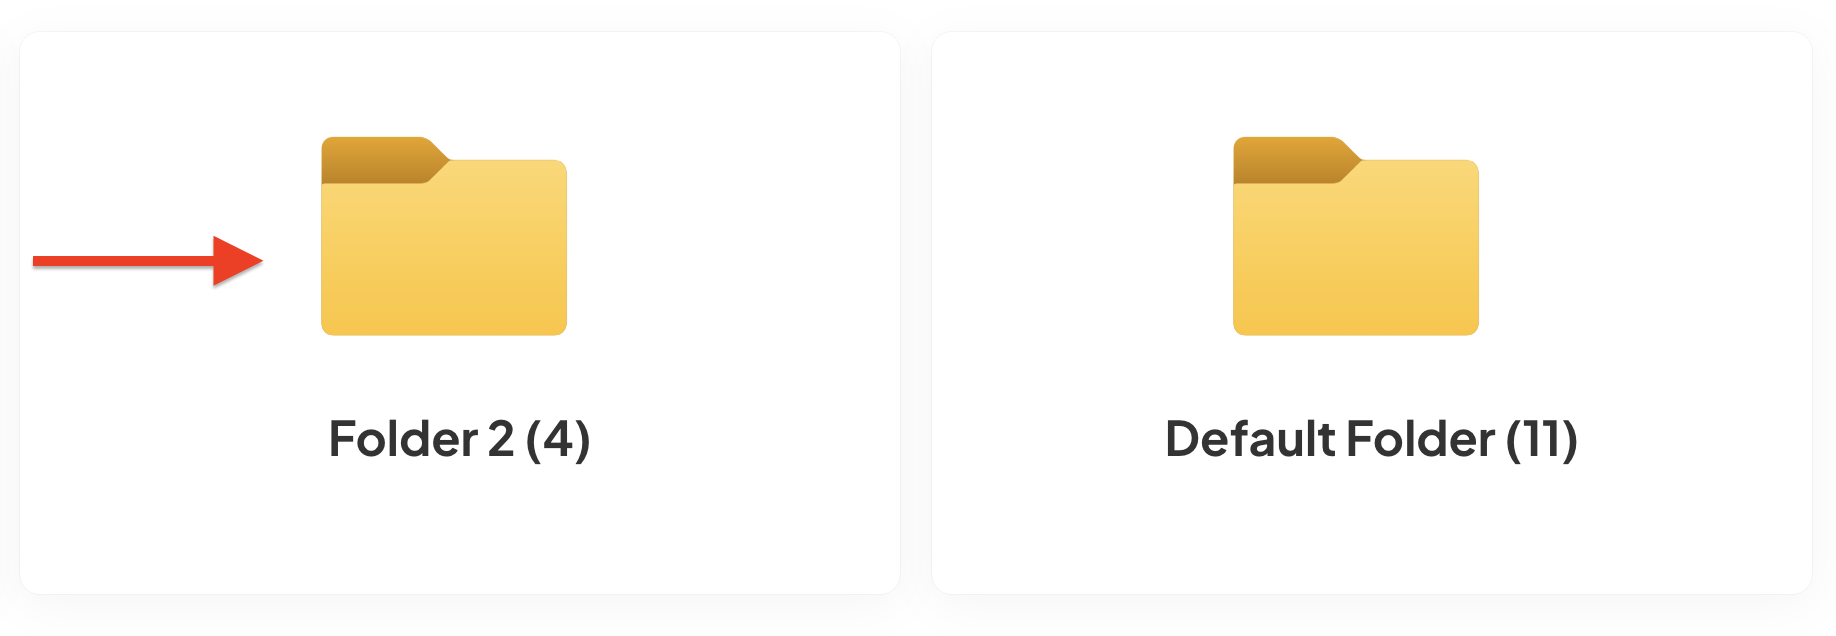
Folder
- You can create a folder and group test scenarios with the Create Folder button.

-
The folder can be deleted by clicking on the trash can icon on the folder. If there is a scenario in the folder, the scenario is not deleted. It is moved to the Default Folder. Scenarios that are not added to any folder are collected in Default Folder.
- The name of the folder can also be changed with the edit icon on the folder card.

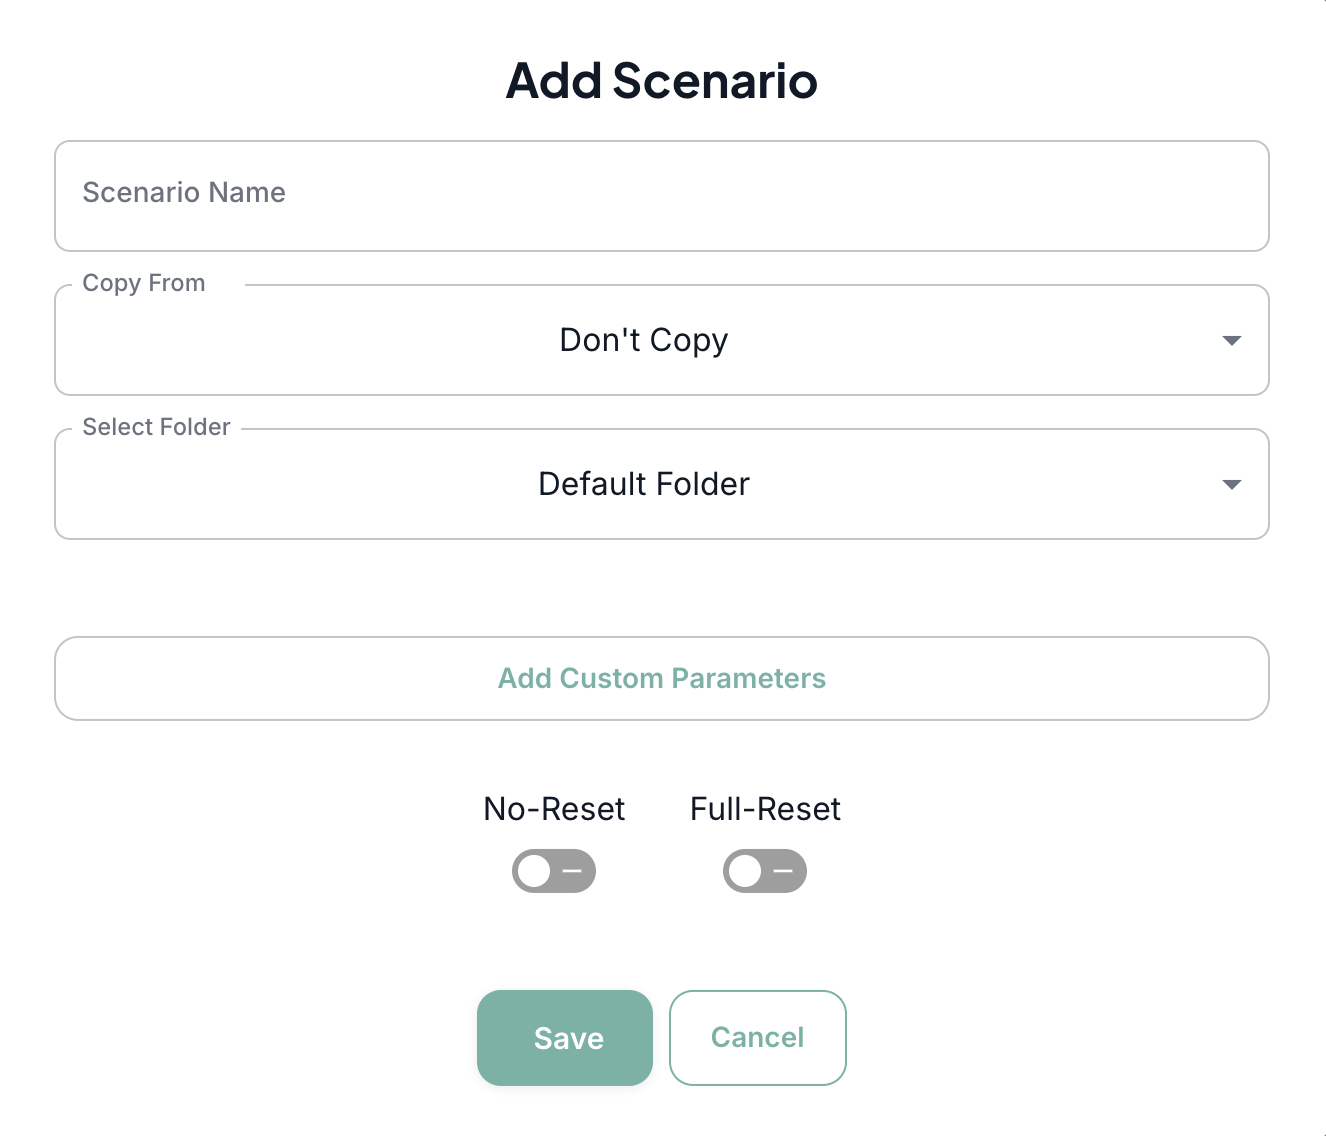
Add Scenario
- To add a new scenario, click the Create Test Scenario button on the Scenarios page.

- In the modal, the scenario name should be written in the Scenario Name field. This field is required.
-
Copy From: If you want to copy all or some steps of a previously created scenario and add them to the new scenario, that scenario should be selected here.
- If Copy from a range is clicked, which steps of the scenario you want to copy must be set.
- If there will be no copying process, the "Don't Copy" option should be selected.
-
Select Folder: In the Select Folder, the folder to which the scenario will be added should be selected. If there is no folder selection, the scenario will be saved to the Default Folder by default.
-
No-Reset: If the application is desired to be run as it is on the device in the newly created scenario, this option should be true.
-
Full-Reset: If the application is desired to be uninstalled and reinstalled in the newly created scenario, this option should be enabled.
-
Add Custom Parameters: If there is another Capabilities value that should be set in Appium to this scenario, you should edit it.
- TestMore supports Appium Capabilities.
e.g, autoGrantPermissions : true|false
have Appium automatically grants permissions your app requires and grant them on installation - If these parameters are desired to be deleted, the delete icon next to value should be clicked.
- TestMore supports Appium Capabilities.
-
Finally, the scenario is created by clicking the Save button.
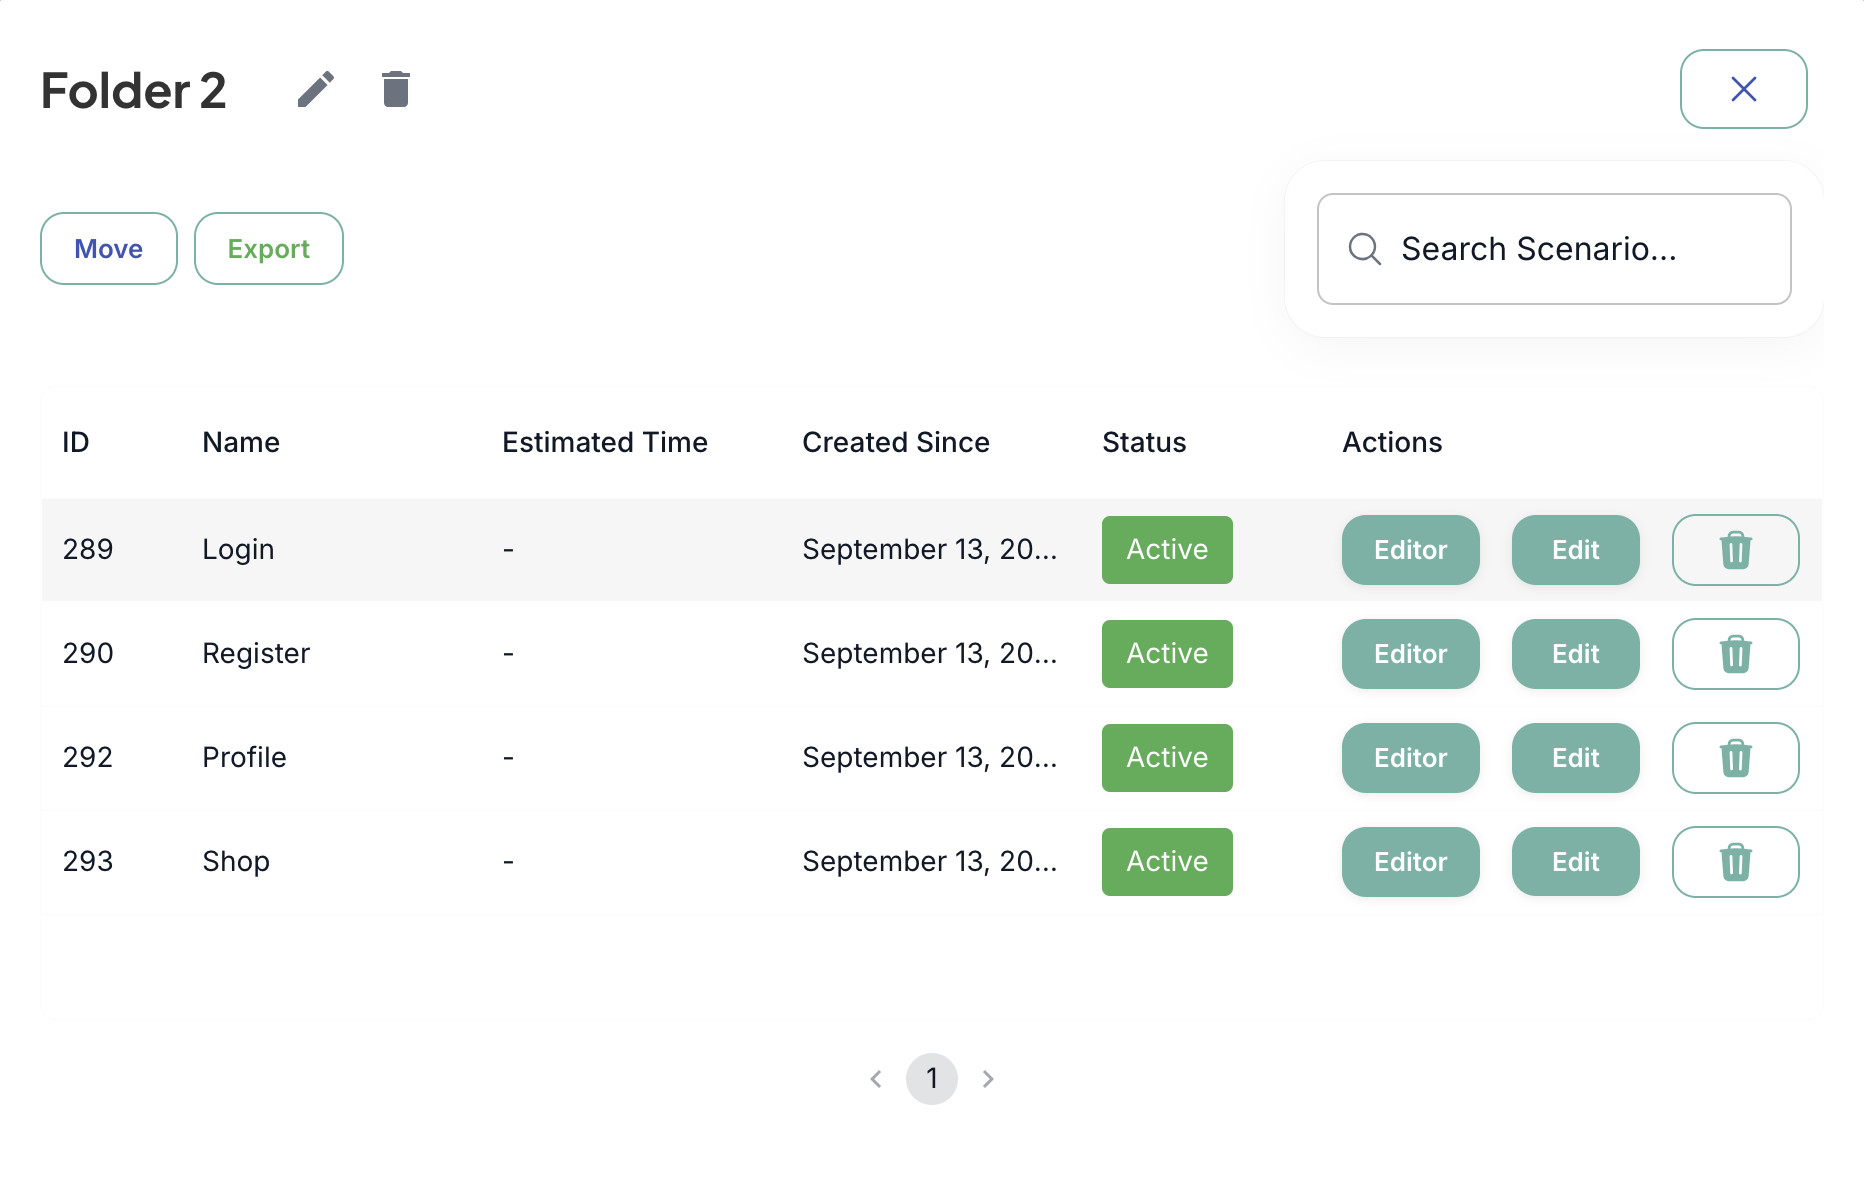
Scenario List
- Click on the folder!
- You can see the list of test scenarios in the folder.
-
The scenario can be deleted with the trash can icon.
-
The information entered while creating the scenario can be edited with the Edit button, and in addition, the status of the scenario can be changed to active-inactive.
-
The scenarios in the folder can be transferred to another folders with the “Move” button at the top left, and can be moved to Default Folder with the “Export” button.
-
The scenarios can be filtered and listed with the Search field.
-
The “Editor” button directs you to the editor page where the steps in the test scenario are added.
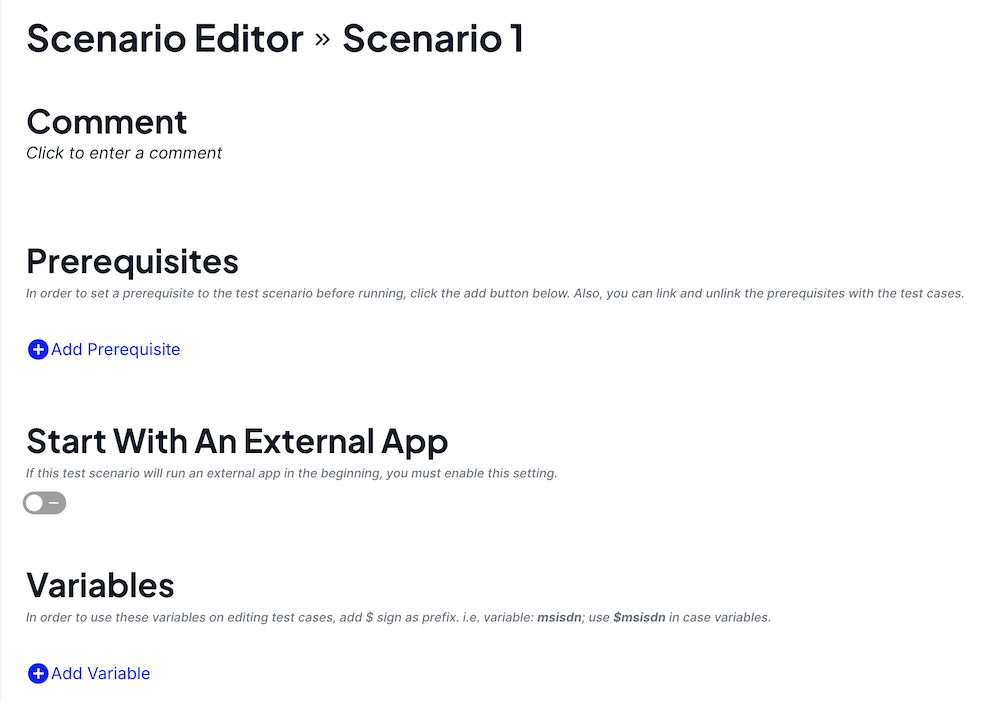
Scenario Editor
-
A description about the scenario can be written in the "Comment" field on the Editor page.
-
In the "Prerequisites" field, the prerequisites that must be met before the Test Scenario run can be started can be set.
-
The "Start with an External App" button should be clicked if an external application will be run at the start of the run of this test case.
-
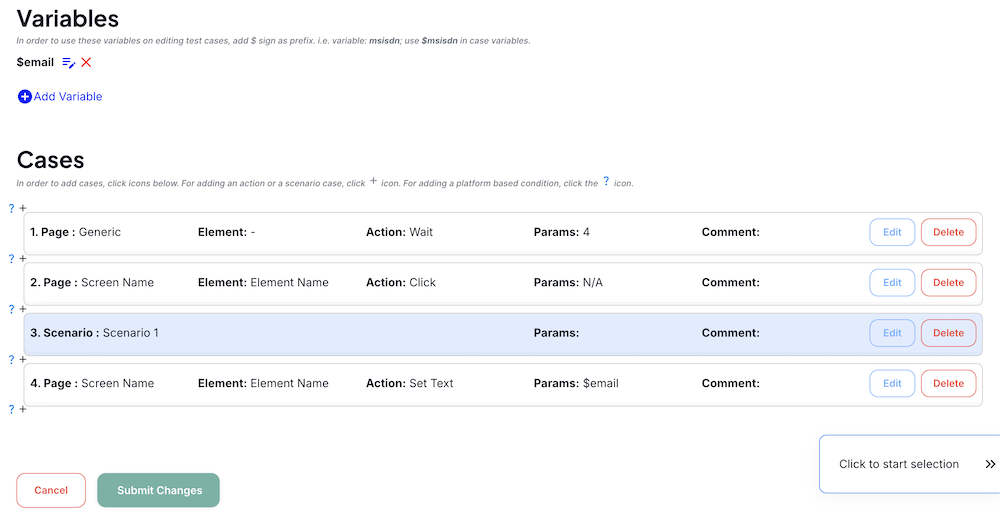
In the "Variables" field, variables to be used in the test scenario can be defined. The values for these variables should be set by the user when creating the test run. (E.g.: $email)
Cases
-
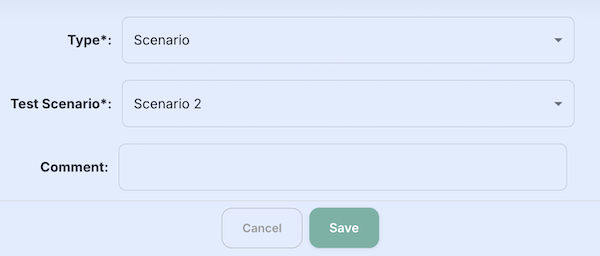
To add a test step, one of the “Case” and “Scenario” options must be selected in the Type field.
- If the Scenario is selected, the selected scenario is completely transferred to this scenario with test steps. Optionally, comments can be written and steps are added with the save button.
Internal scenarioIf there is no previously created scenario, It is not possible to add an internal scenario to the script. Scenarios are formed by creating more than one case.
- If the Scenario is selected, the selected scenario is completely transferred to this scenario with test steps. Optionally, comments can be written and steps are added with the save button.
-
-
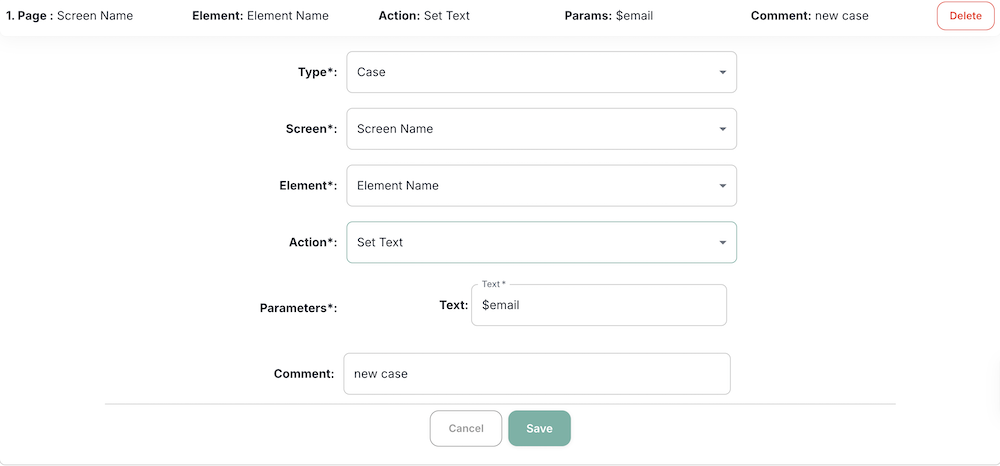
If you are going to use an element on any screen to interact with the UI “Case” should be selected from the Type field.
-
The screen where the elements we will use are saved is selected from the Screen section.
-
From the "Element" section, the element to be tested for the selected screen is selected.
-
The action to be performed on the element is selected from the Action field.
-
If the element requires parameters, the parameters to be entered are written in the Parameters field.
-
After writing the optional comment, the scenario step is created by clicking the “Save” button.
-
Create more than one case in the scenario by repeating the above steps.
-
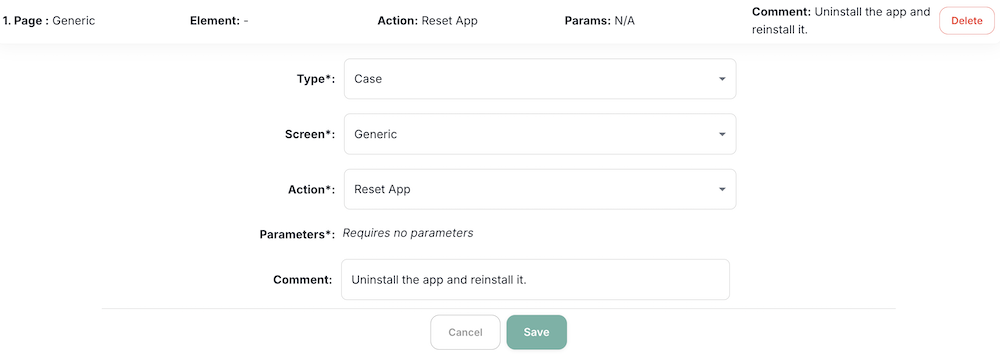
Testmore contains element-dependent and generic actions. Click to reach Testmore Actions
Generic Actions provide element-independent functions. If you select Generic from the Screen section, these methods will be listed.
- After the scenario is completed, click the "Submit Changes" button at the bottom of the page to save it. To exit without saving, press the "Cancel" button.
The order of the scenarios on the page can be changed by holding on to them and swiping them up and down.
-
- The step can be edited with the Edit button.
- The test step can be deleted with the Delete button.
- The test scenario is saved by clicking the Submit Changes button.